


🎯Background :
In the previous git article, we touched on some bare minimum topics of git and some concepts of branching. We have seen as a developer we have to work in teams. For that, we used branching concepts in our previous article.
🎯preface :
In this article, we are going to touch on the tool Gitviz and its importance, some use cases of Gitviz, merge strategies, the garbage collector in git, reset, rebase, merge conflicts and some topics on GitHub. So this will be the concluding article on git and GitHub and most of the concepts get clear here.
🎯Gitviz :
It is a visual tool that provides us with a graphical view of behind the scene in git commits area. You can download its .zip file from its GitHub account and after extraction, it is ready to use.
After downloading you have to provide your local repository path to it and as you proceed to your work it will keep on tracking your local repo.
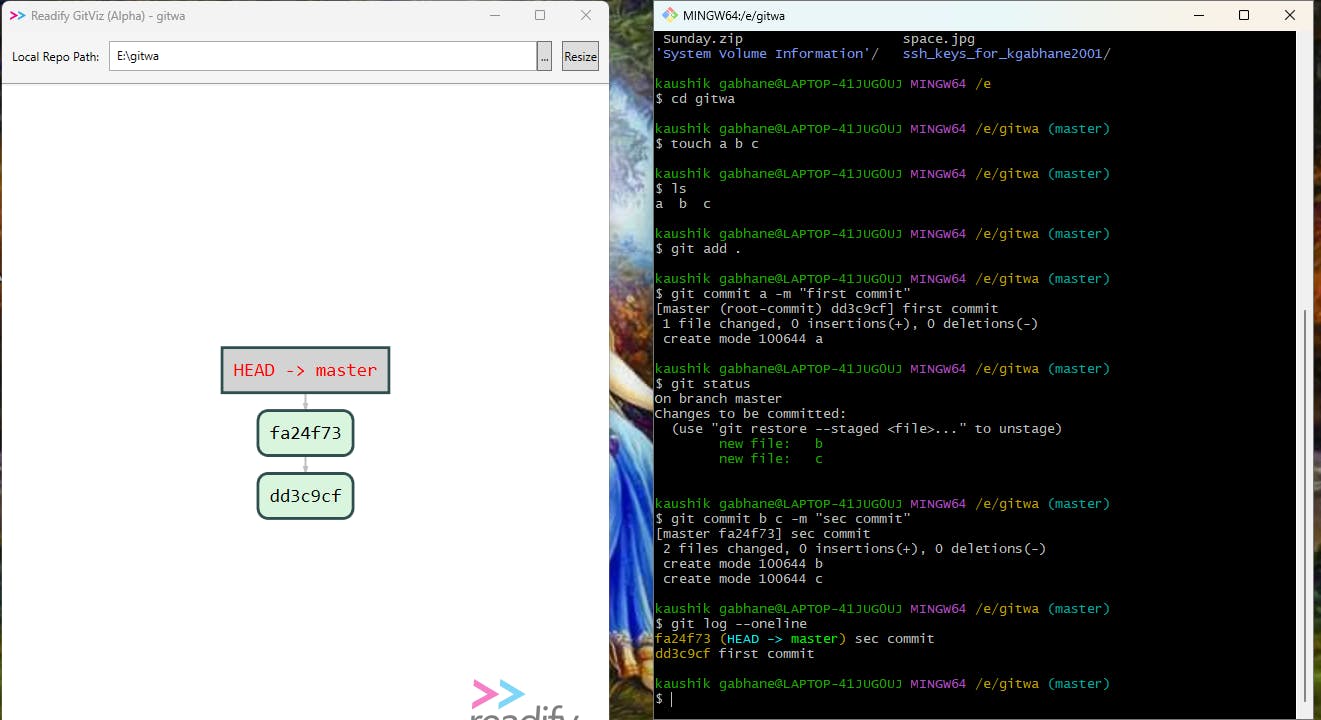
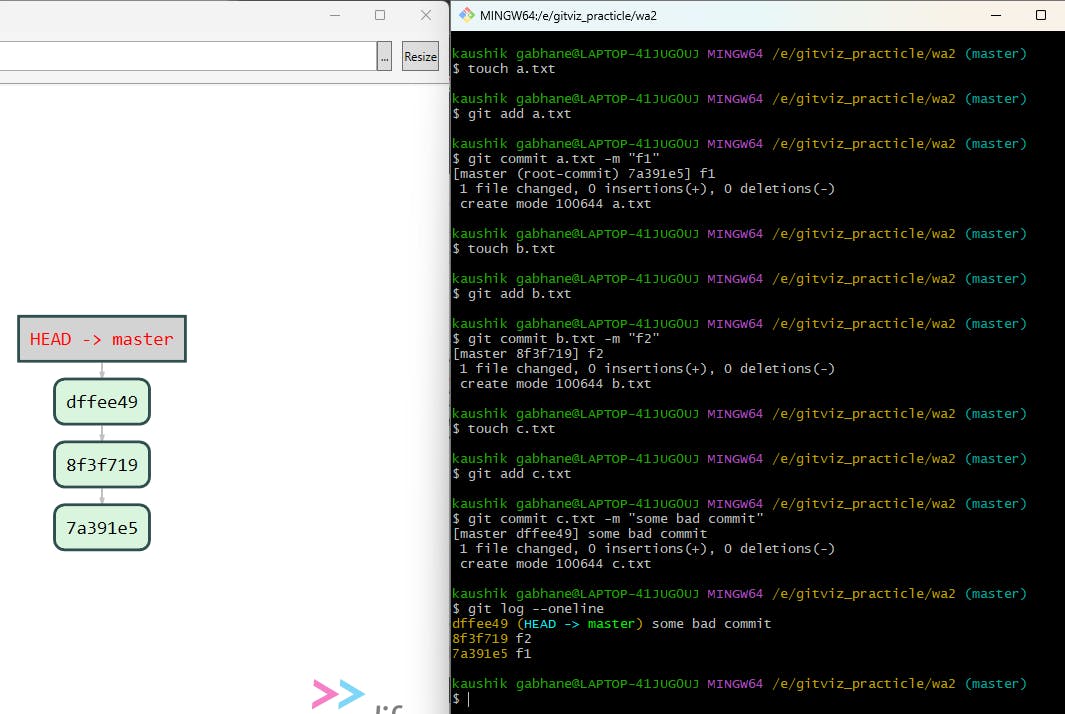
As you can see here in the above example, I have mentioned my local repo. path in Gitviz as gitwa and it starts tracking my modifications in files. I have created two commits and the latest commit is pointed to by the head. You can compare both commit IDs of the latest commit in git and Gitviz is same.
Now we will see some use cases in Git-based on the position of the head pointer.
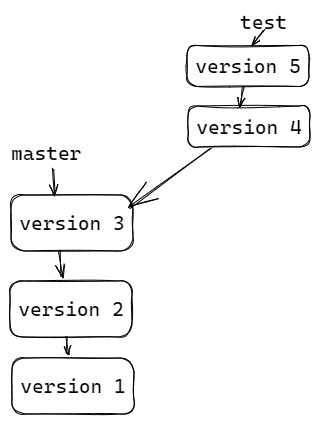
1) Bug-fixing :
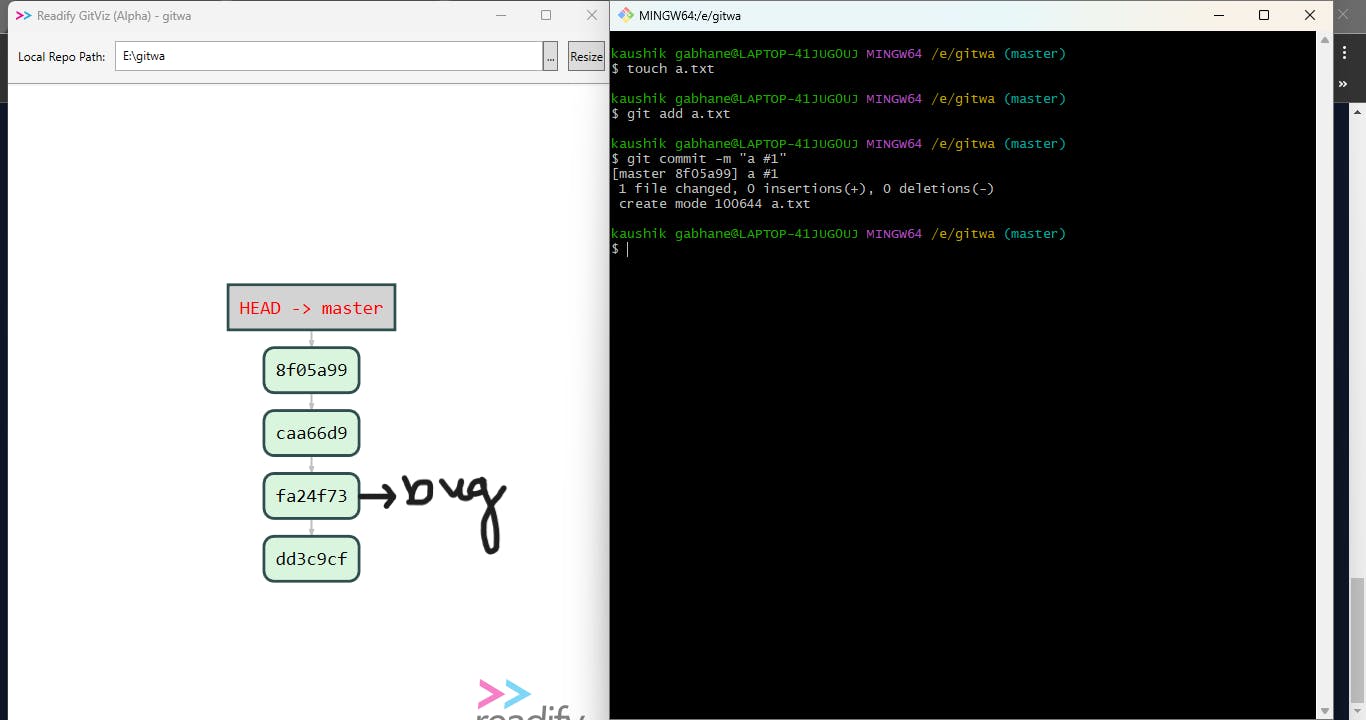
So, in the above example, we have created 4 commits and after some time we found some bugs at 2nd commit ( typically known as versions of the program ). Now we have to go back then and fix that bug.
Bug-fixing directly in the master branch is not a good practice so we will do it by creating a new branch after pointing the head on the second commit.
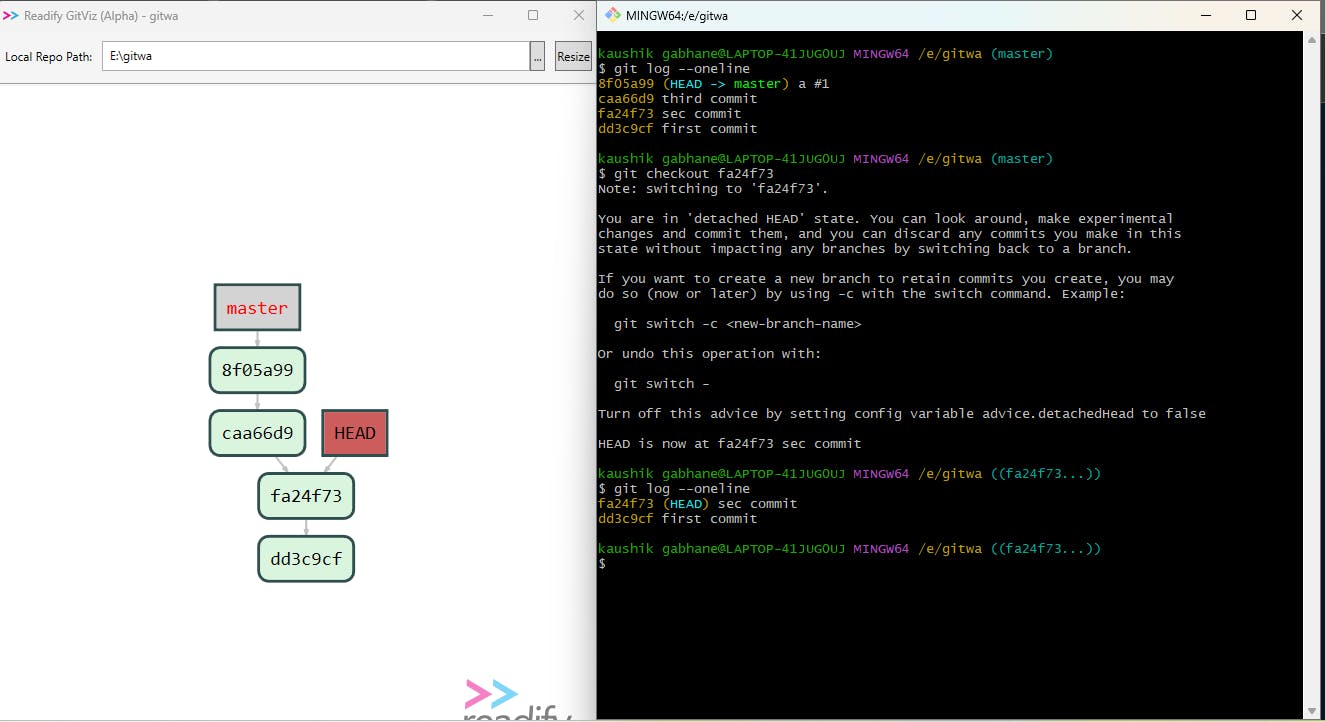
In the above example, initially head is pointing to the master branch then we used git checkout "commit_id" to move our head at a particular version ( or commit ) and as of now our head is pointing to the second commit and shows commits previously to it.
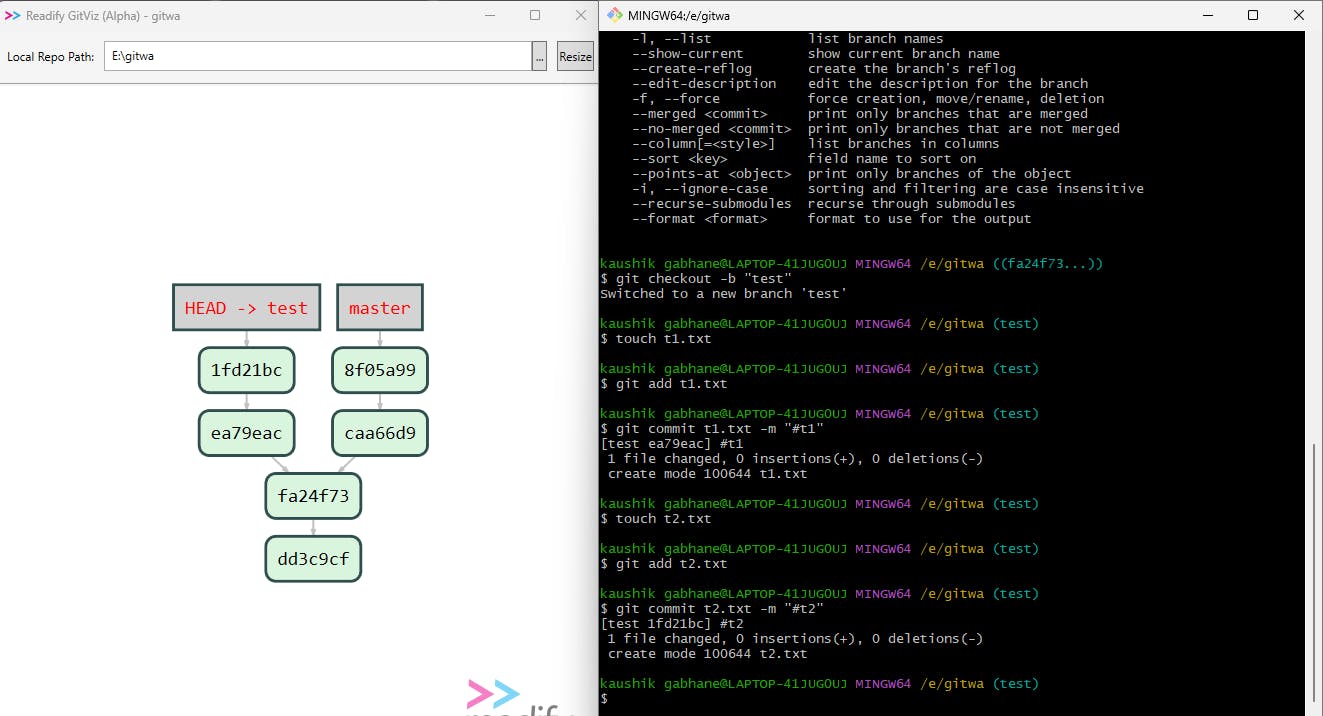
Here you can see, we have created a bug-fix branch called test with the help of git checkout -b "test" and we have added two files to fix the bug.
Now as the bug is fixed we have to merge these two branches.
But as we have seen before, we merged a branch which is initialized on top of the master branch as given in the below image.
Cases like this use fast-forward merge which merges these two branches directly. But our case is different than this as our branch test is initialized on a particular version of the project. So we will follow the below way.
Unlike merging test nodes directly here they follow the ort strategy which merges two branches with a new commit where all data of the test branch is available.
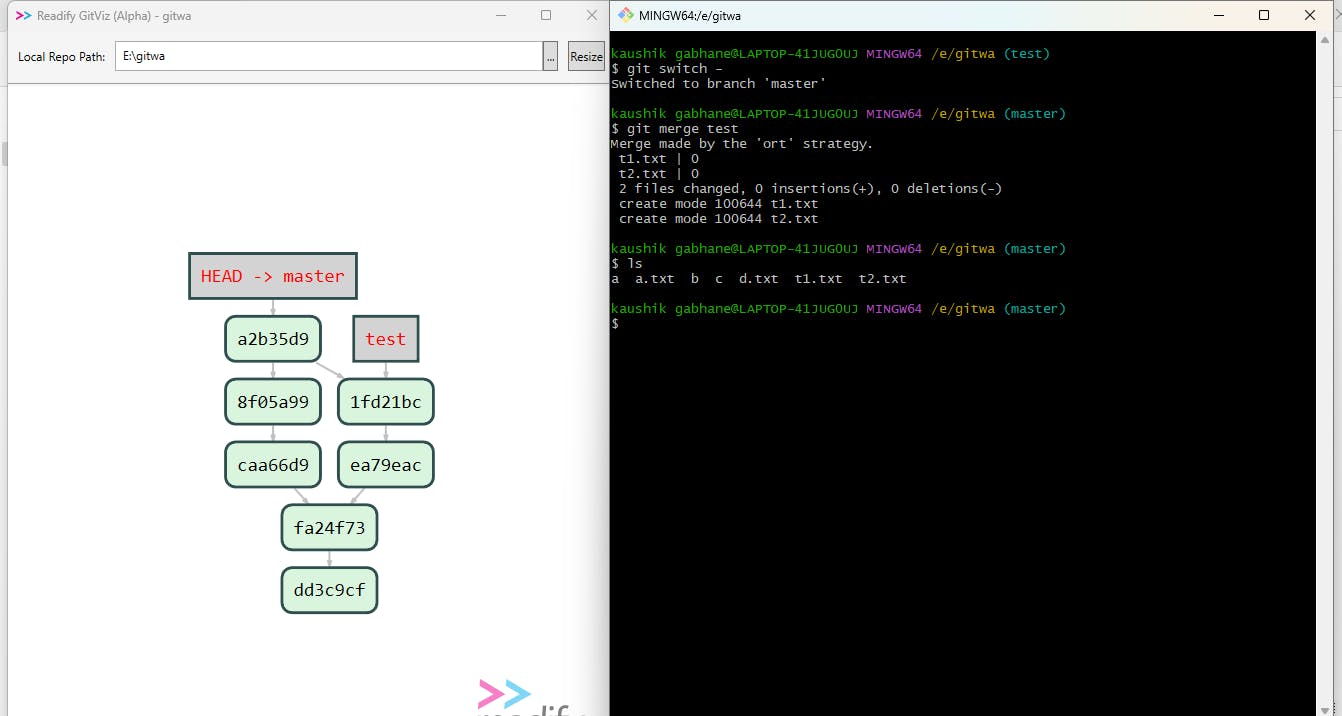
For merging the test branch first, we have to switch to the master branch. We have two commands for switching between branches,
1) git checkout "BranchName"  => takes you to perticular branch
2) git  switch -              => takes you to previous working branch
So we have used git switch - and the head is pointing master now.
Now we will merge these two branches using the git merge test command. As soon as you hit enter you will see a vim editor. Write your " merge comment " there and after exiting from vim your merge gets complete and you can confirm it by doing the ls a command where you can see all files from test and master.
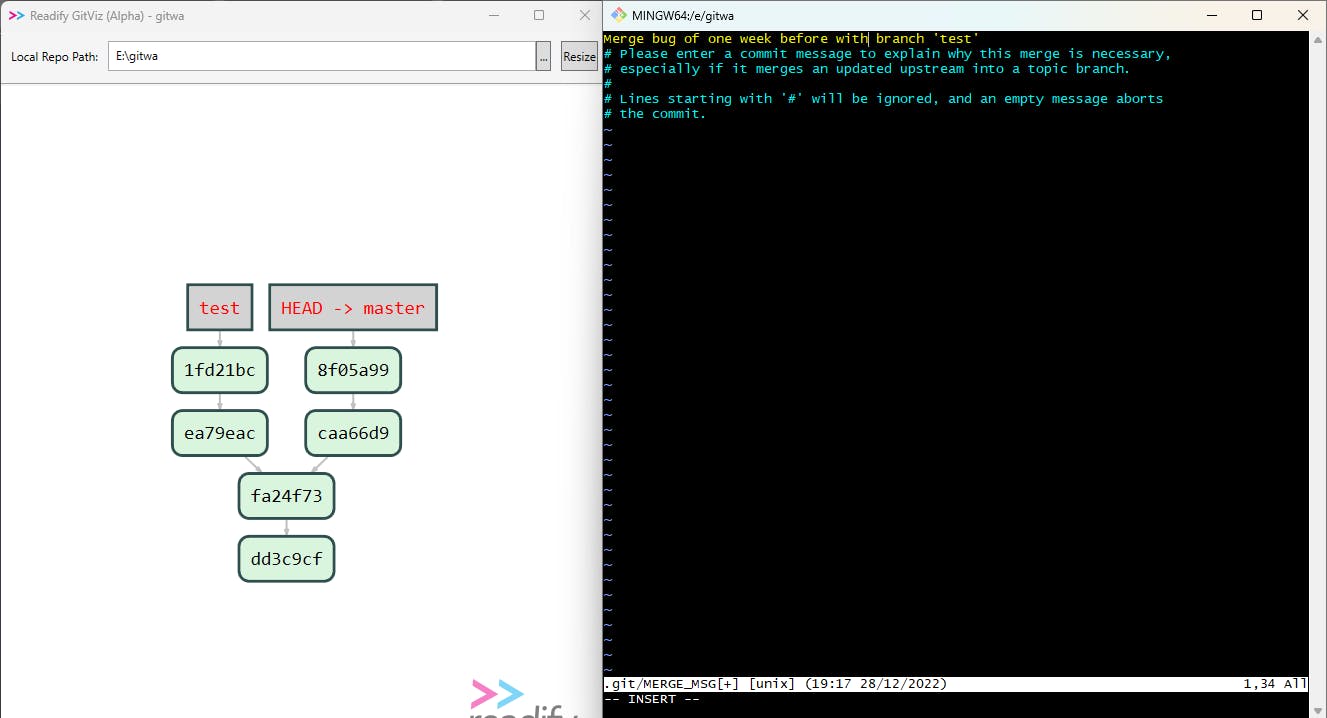
To, insert a merge comment into the vim editor use the " i " button on your keyboard. Now you can write your comment in the first line.
To, exit from the vim editor
Use " ESC " key first
Type
colon and wqwhich you can see at the bottom left corner and as soon as hit enter your will exit from the vim editor.
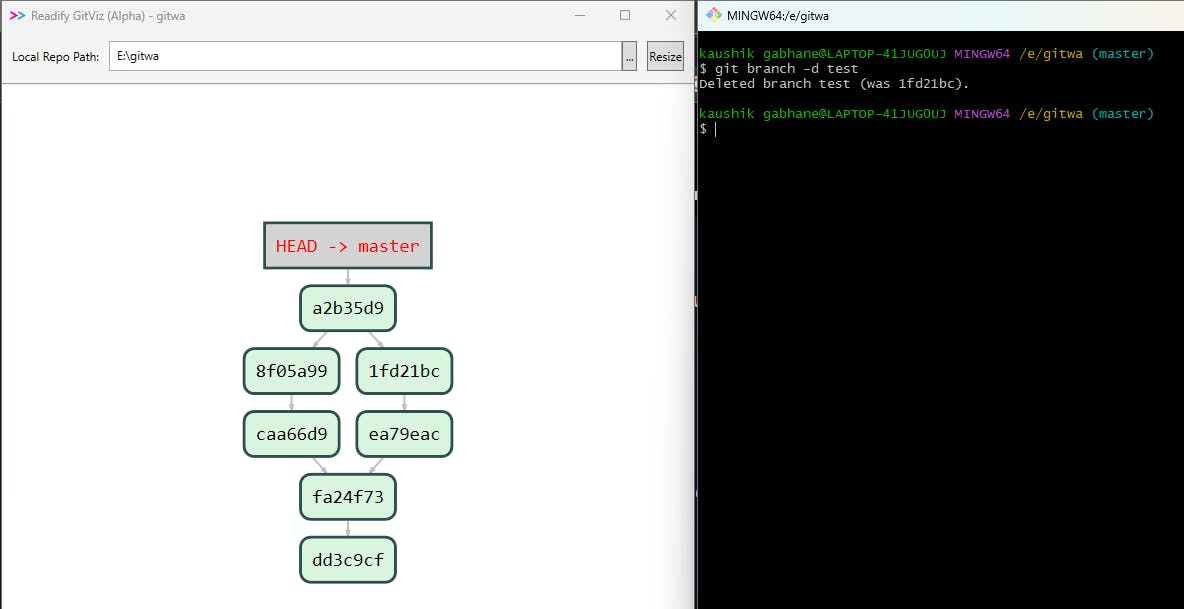
After branches get merged our moto of bug-fixing is done and we do not need the test branch anymore so we will delete it. You can see the history is now clear on the master branch.
2) amend in git :
The --amend option is used in the git commit command and is used to modify the most recent commit. It can modify the commit message and data of the most recent command.
Here we are going to amend the commit message in below example,
Here we have created three commits and in the latest commit provided the comment " some bad commit " which we are going to update with amend option.
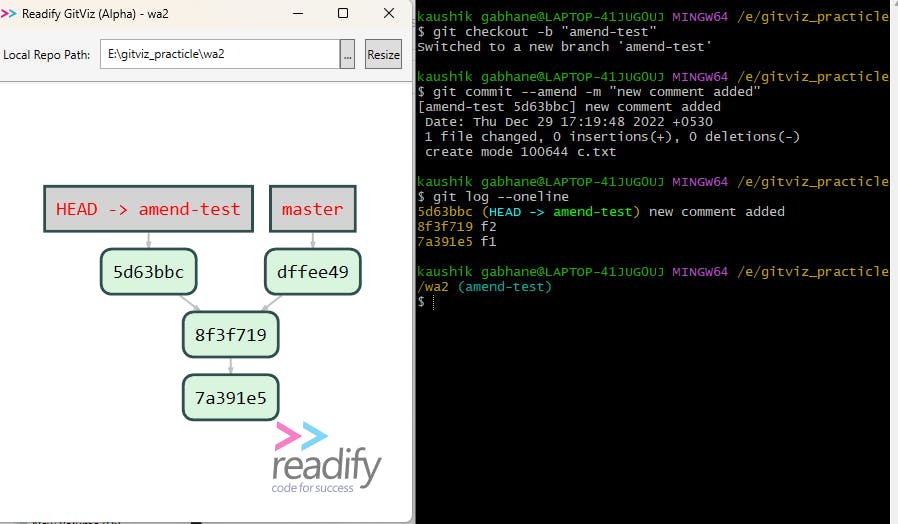
Now we will see step by step explanation,
In the first line, we created a branch named " amend-test " and switched to the amend-test branch. As we have discussed earlier 💥💥 making changes directly on the master branch is not a good practice.💥💥
In the second line, we committed changes with the help of
--amendoption. This option creates a new node with a copy of data in the latest commit ( commit id dffee49 ) and gives a new commit message to it.The
git log --onelinethe command is used to confirm our operation of amending commits.The merging part may create conflicts but we are going to cover it in upcoming topics.
Let's take a scenario that, you have to amend one or two more times due to some reason then --amend will follow the same procedure as in step 2 mentioned above.
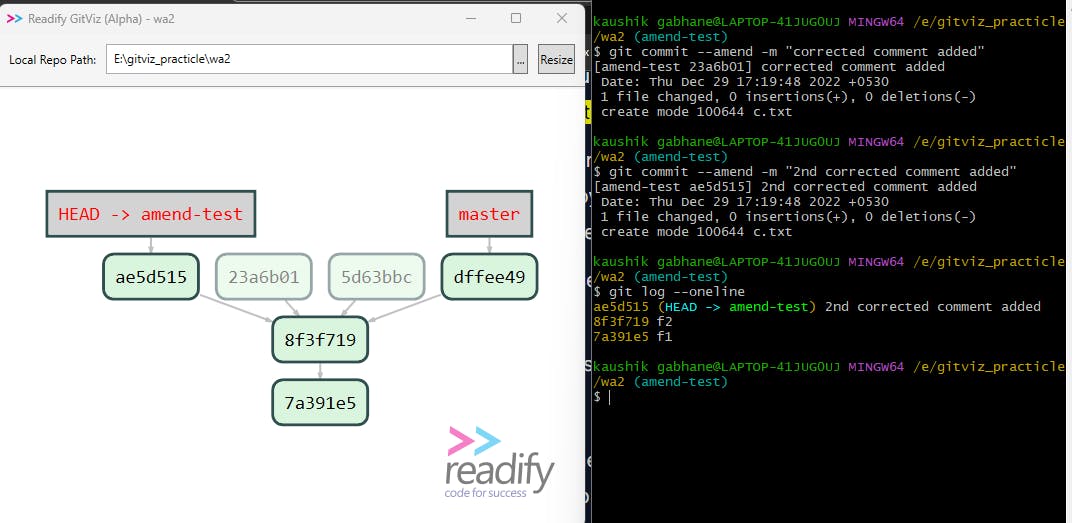
Here the amend-test branch gets amended two times more and now points to the latest commit. But what about the previous two commits? They are neither connected to any branch.💥 Such nodes are called orphan nodes or unreachable nodes and git log --oneline command is unable to give its history.
3) git reflog :
Then, how do we get its history? So we have another powerful command as git reflog which stores all history of our movement in the git terminal.
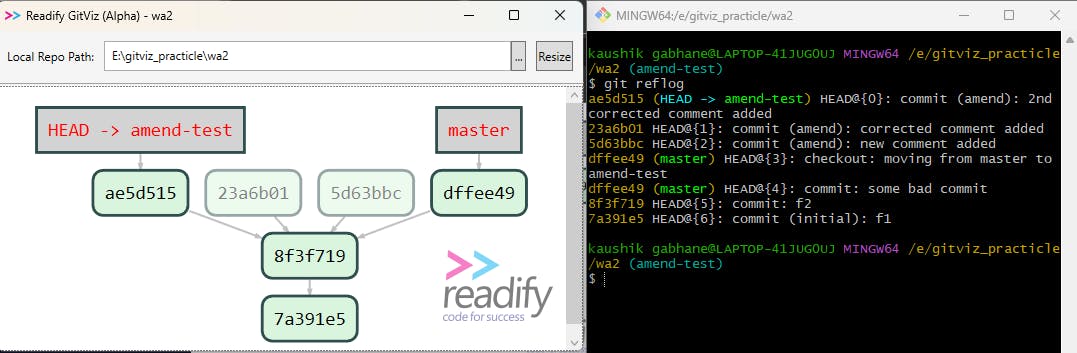
Here above you can see all history of this repository since the first commit and the history of that two orphan nodes also with the help of the git reflog command.
Now, if we want to go back to some orphan node and have to check data at that point in time. The only challenge is how we do that. Because none of the existing branches and the head also pointing that.
We can move our head to that particular node if we know the commit id of it. The commit id we can get from
git reflog orGitviz graphics.
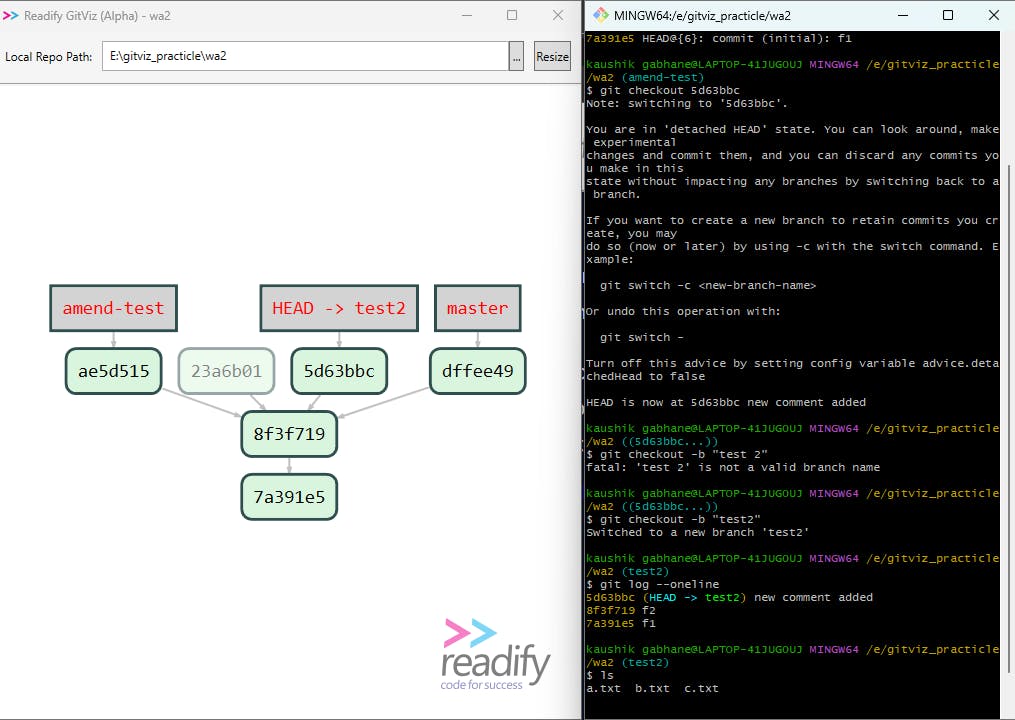
Here we first move the head pointer to the desired orphan node by checkout command as shown in the above image.
Then we create a new branch test2 and moved to it. Now we can check our history and connection by
git log --oneline. We can check our files at that point bylsand can read withcatcommands.After our work gets completed we can check out to amend-test branch and delete this test2 branch.
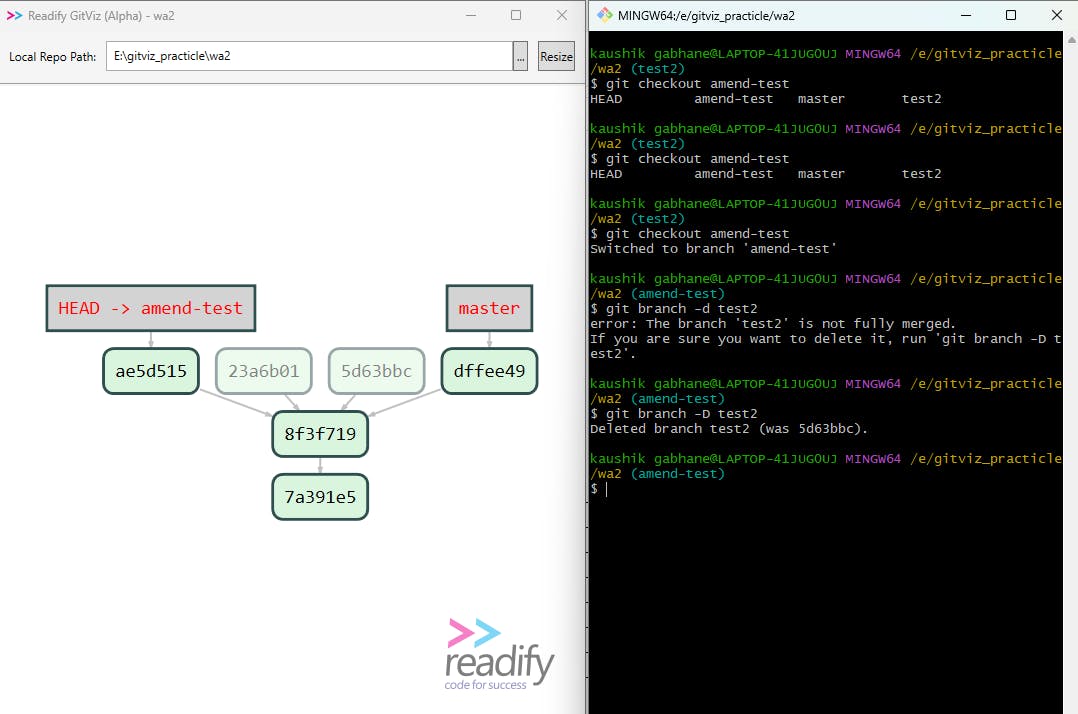
Here you can see that, as we go to delete the test2 branch it throws an error. This tells us "💥 branch is not yet merged so do you want to forcefully delete 💥" and we execute this by the last command.
Here, if our work with that orphan nodes gets completed; there is no need for it in our working tree. So we have to clean our working tree from time to time.
So here is the procedure for cleaning our working tree,
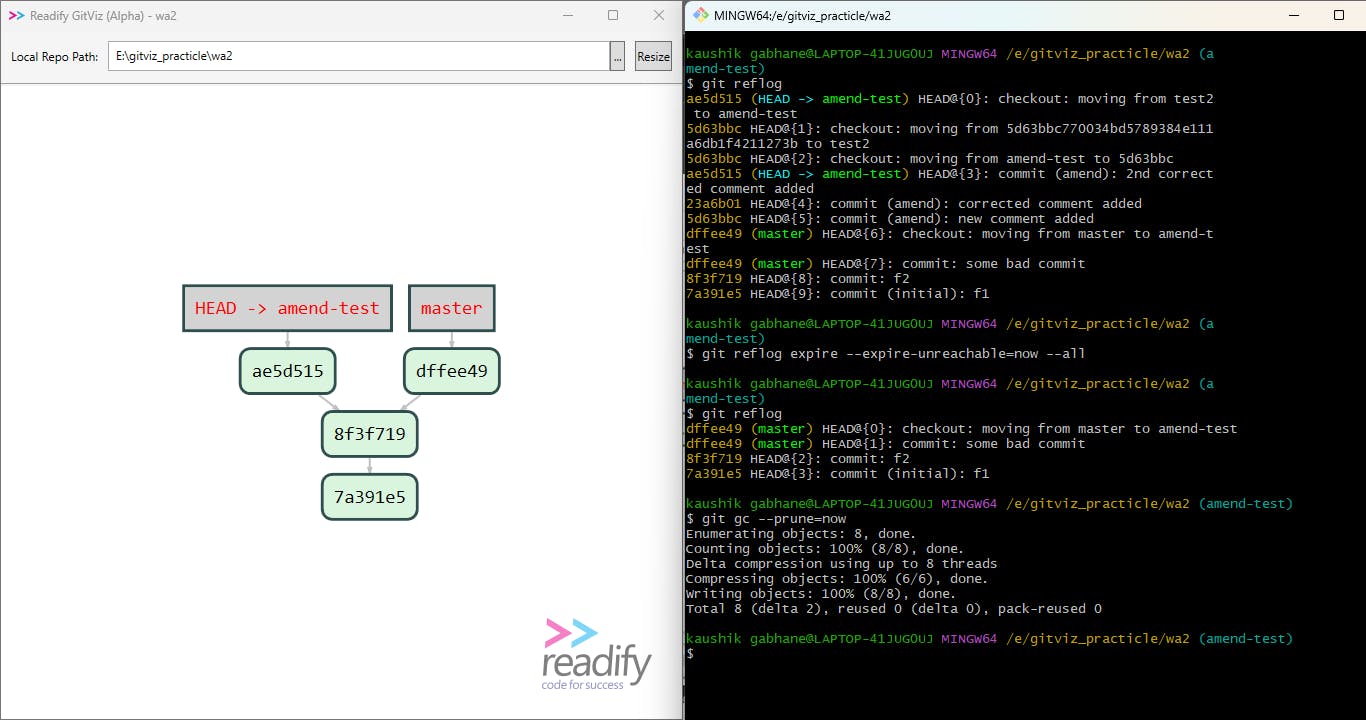
We are checking whether any orphan node exists in the working tree or not by tallying
git refloghistory and Gitviz graphics.Here in the second command, we are deleting every orphan node from our reflog history.
git reflog expire --expire-unreachable=now --allwith this command, only the history of the reflog gets cleaned not from the working tree ( commit area on Gitviz ).💥💥You can check it by running the
git reflogcommand once again.The garbage collector is a program in git which helps us in cleaning the nodes from our working tree. So to initialize that we have to execute a command
git gc --prune=nowjust after the previous one and our working tree is clean now as in the picture.😀
Here, 1) gc - stands for the garbage collector.
- --prune=all - stands for delete all.
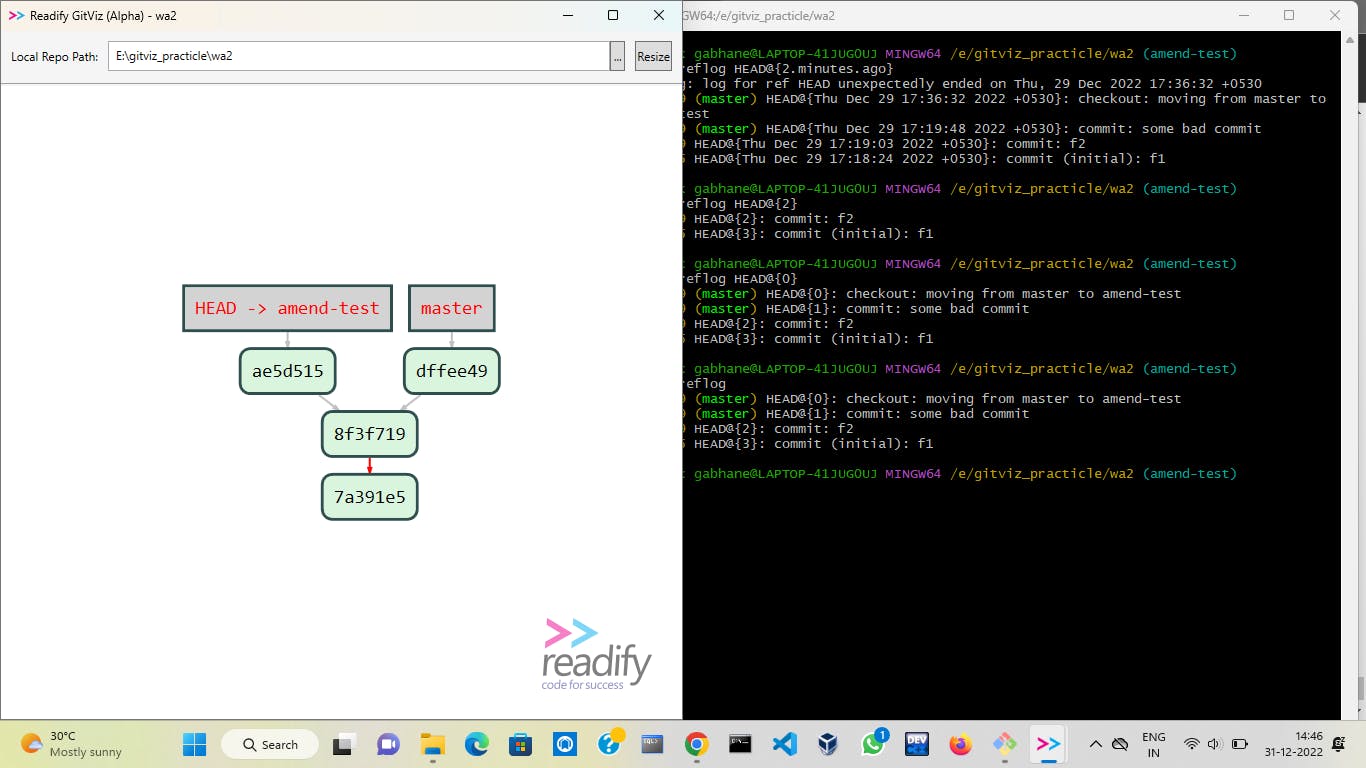
- Sometimes it's very tedious to check every commit to search for our desired result in git reflog. So here is our work gets easy with the help of some options in
git reflog. You can study a few of them below.
4) Merge strategy :
🎈squashing :
Let's take a scenario, in which we are going to develop some features for our software and the number of developers working on it.

After the first developer's work gets completed he tries to merge it on the master branch and other developers will also do the same.

In this case, the history of the master branch gets bigger and may contain thousands of commits.
Now project leader wants to go on some particular commit, so it will get very difficult to search particular commit among thousands of them.
Hence, here the concept of squashing helps a lot in decreasing the history size and making our work easy without losing data.
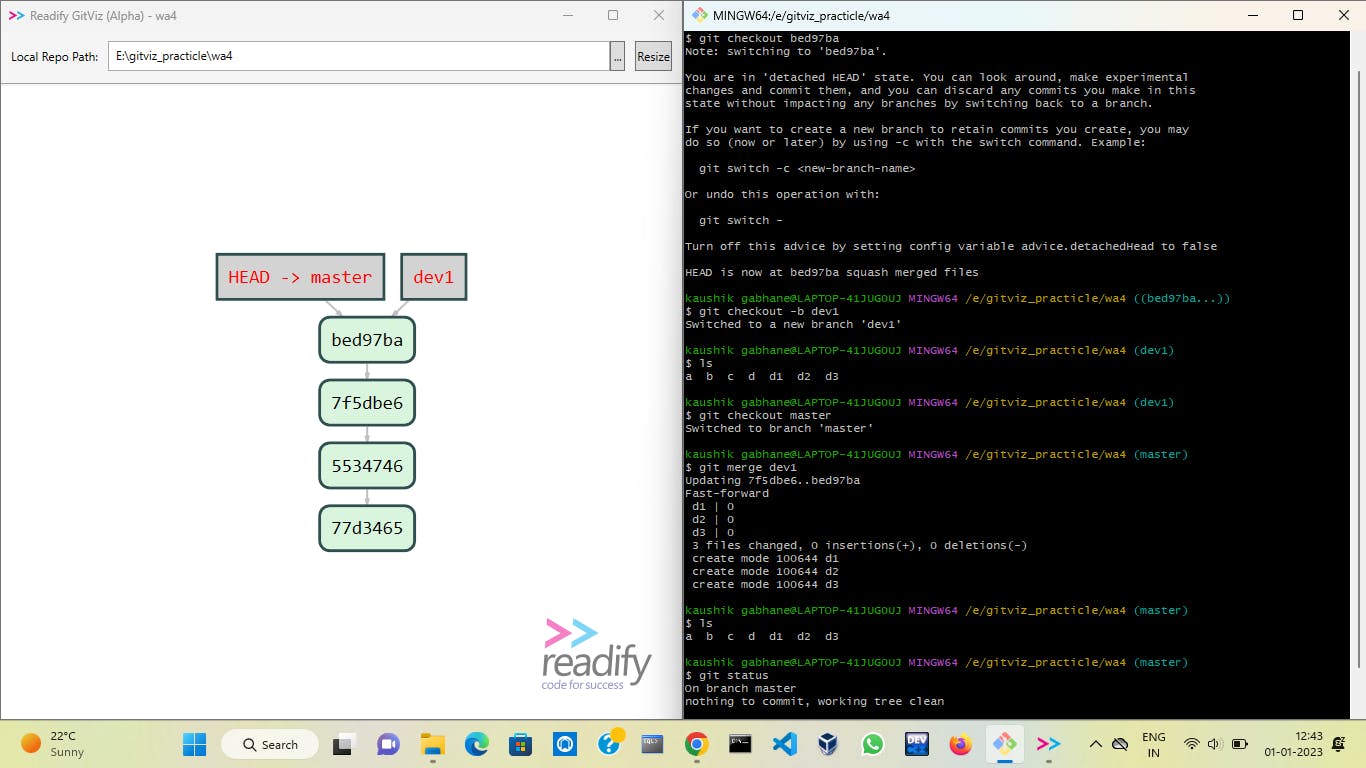
Squash: In this merger strategy, on merging with option --squash it will pull all data from the dev1 branch to the master branch and put it in the staging area of the master branch then on commit all data of dev1 can be seen in the master branch.
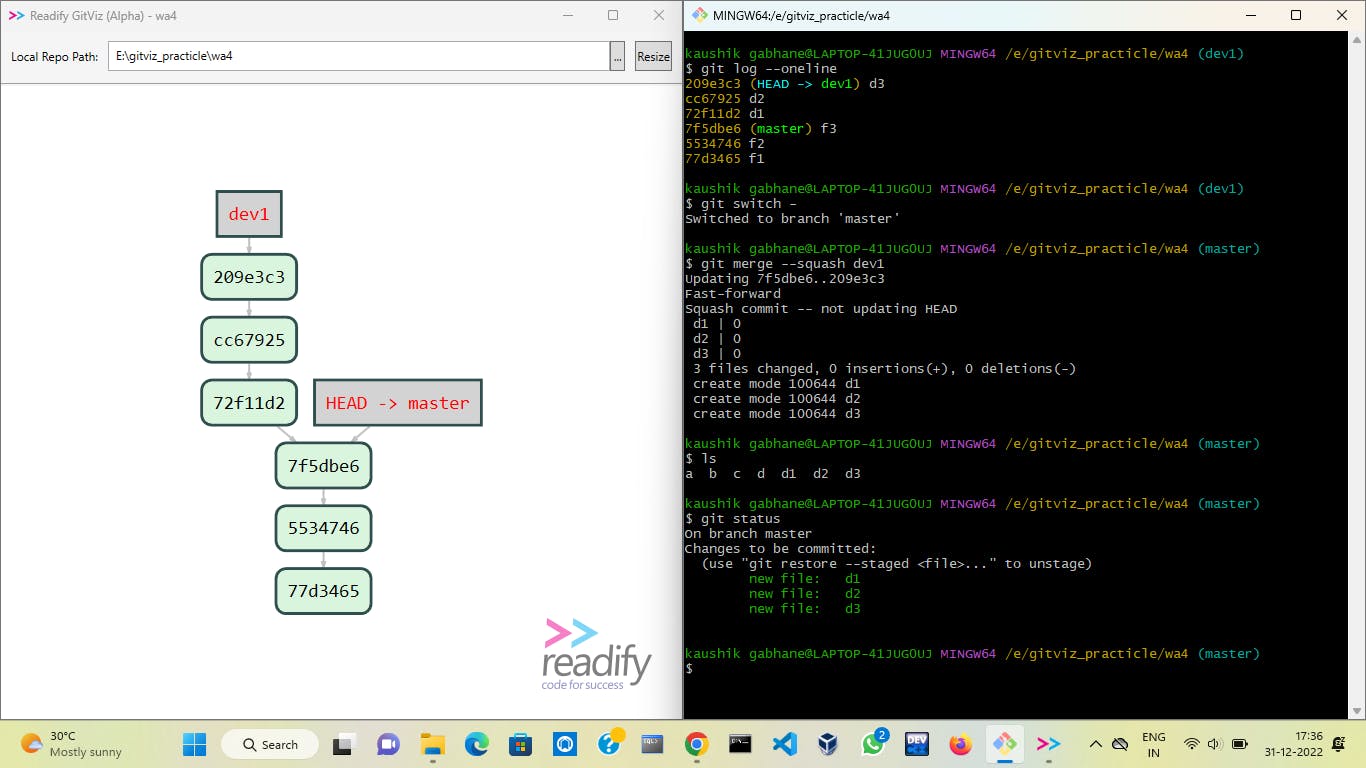
As you can see files are placed in the staging area of the master branch.
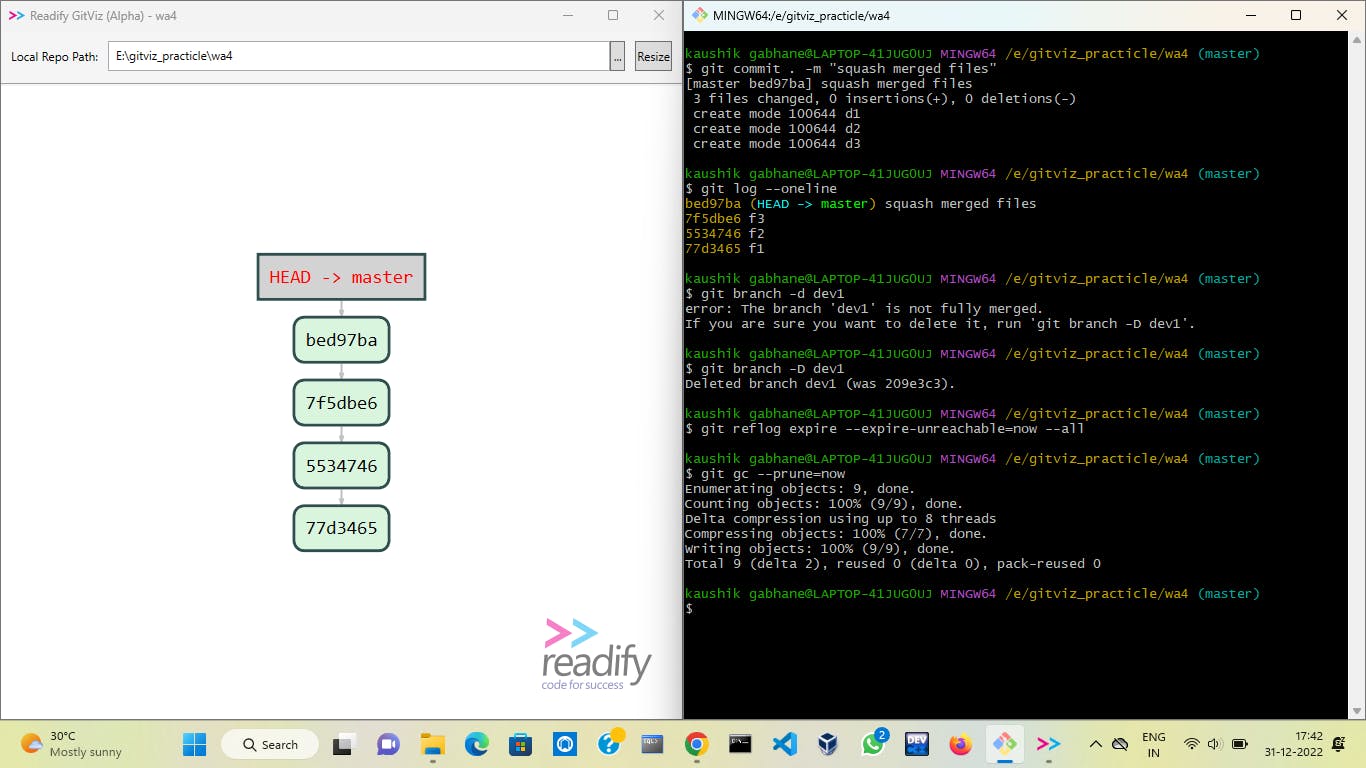
Then we commit all staged files and they get added to the master branch with a new commit. The work of developer 1 here gets completed hence we are deleting that branch.
We know that all data of dev1 we have added to the master hence we will delete it forcefully and all expired nodes are cleaned with the help of the last two commands.
5) Reset :
This is one of the important topics in git which should be known by a developer.
Reset is used to take back the head pointer to previous commits as we required in our development project. There are three types of reset,
soft reset 🙂
mixed reset 😉
hard reset 😠
1) soft reset :
Let's take the previous example of the merge strategy for this reset explanation.
If we have a case in which, we have to take back the head pointer by some commits and put all that data into our staging area then we can use a soft reset.

💥💥To exit from the cat command use - ctrl + D 💥💥
Here in the above example, we have executed the soft reset command by one head back and we can see that all files of that commit are returned to the staging area.
Then we modified our changes to desired files and since they are already in the staging area and we have committed them and you can see now, our working tree showing clean.
Unlike this example, we have to create a new branch as soon as we create a soft reset as making changes directly on the master branch is not a good practice I have forgotten it in this example so I apologise 😁.
After executing a soft reset we have to create a new branch dev1 with the command
git checkout -b dev1.After that, we can change our files as we want and commit them as shown above.
Now let's say we are not satisfied with our changes and we want to go back to our previous commit id i.e. bed97ba then we have to follow the procedure given below,
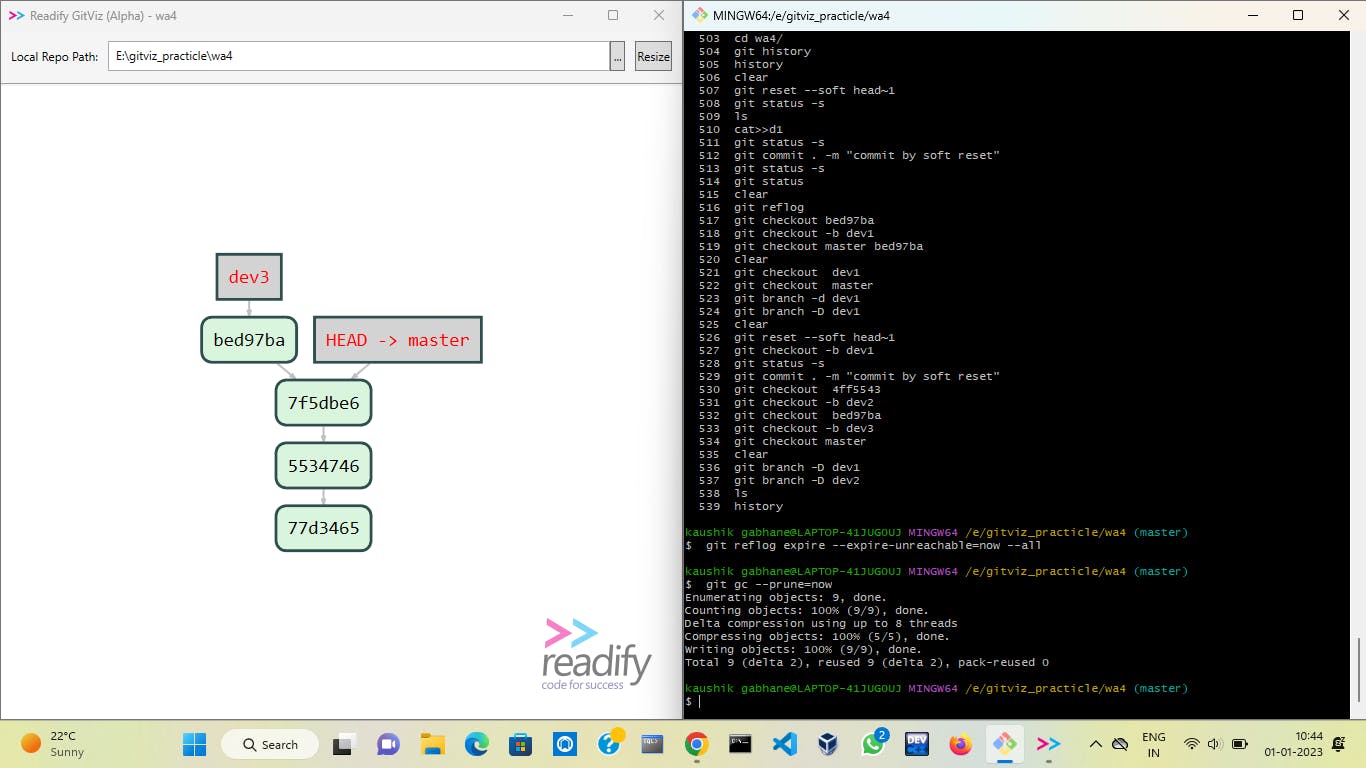
Now to get back to the previous version we have to check out that commit with the command
git checkout bed97baand create a new branch dev3.Then check out to master and delete branch dev1 forcefully with the command
git branch -D dev1.Now we can clear orphan nodes with the following commands
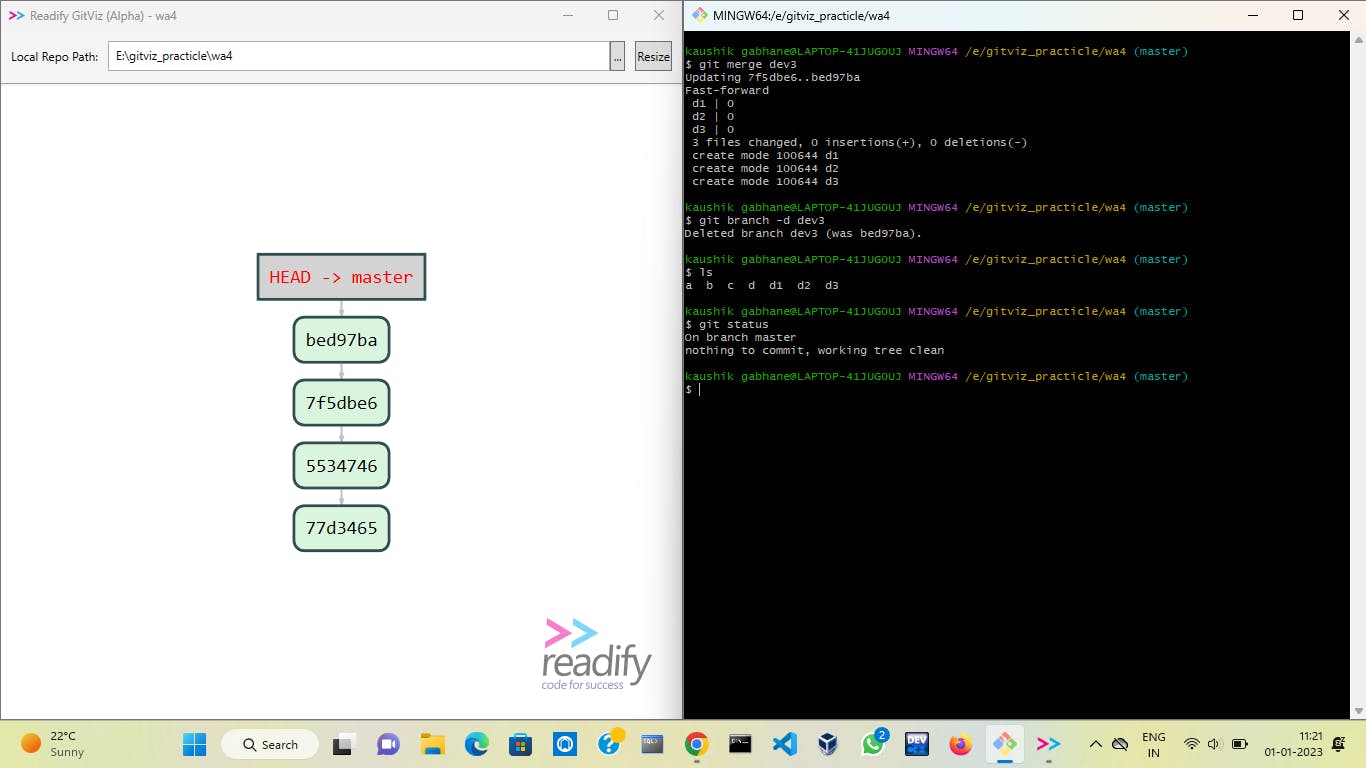
git reflog expire --expire-unreachable=now --allandgit GC --prune=nowand we will get a picture like the above.Now just merge the dev3 branch to the master and you will get all files as initial ones.
2) mixed reset :
If we have a case in which, we have to take back the head pointer by some commits and put all that data into our working area then we can use a mixed reset.
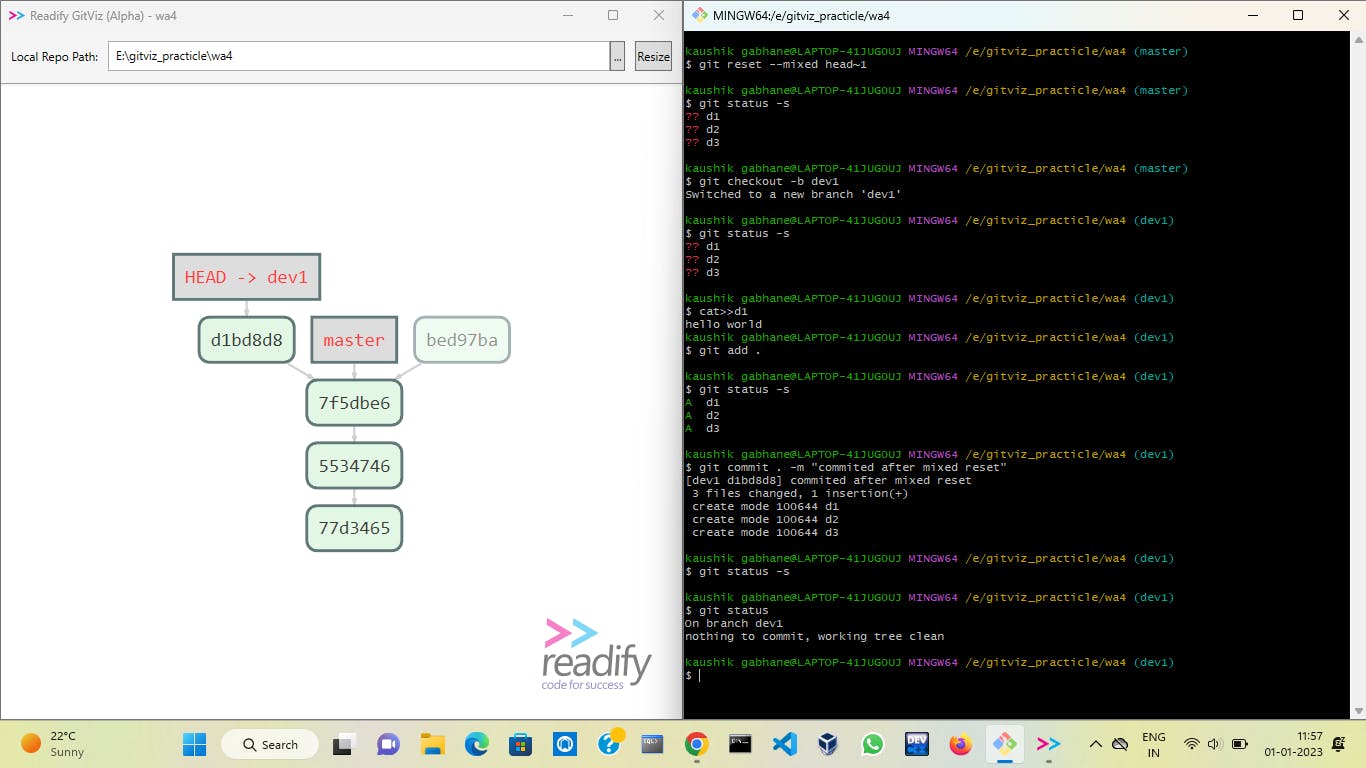
As you can see above, after a mixed reset all files are returned to the working area. Now we shift to a new branch and make changes as we want in the files. Then we can add and commit them.
Now if we want to back to our older version then we can move the head pointer to that commit id with the command git checkout bed97ba then create a new branch on it then you can access that files.
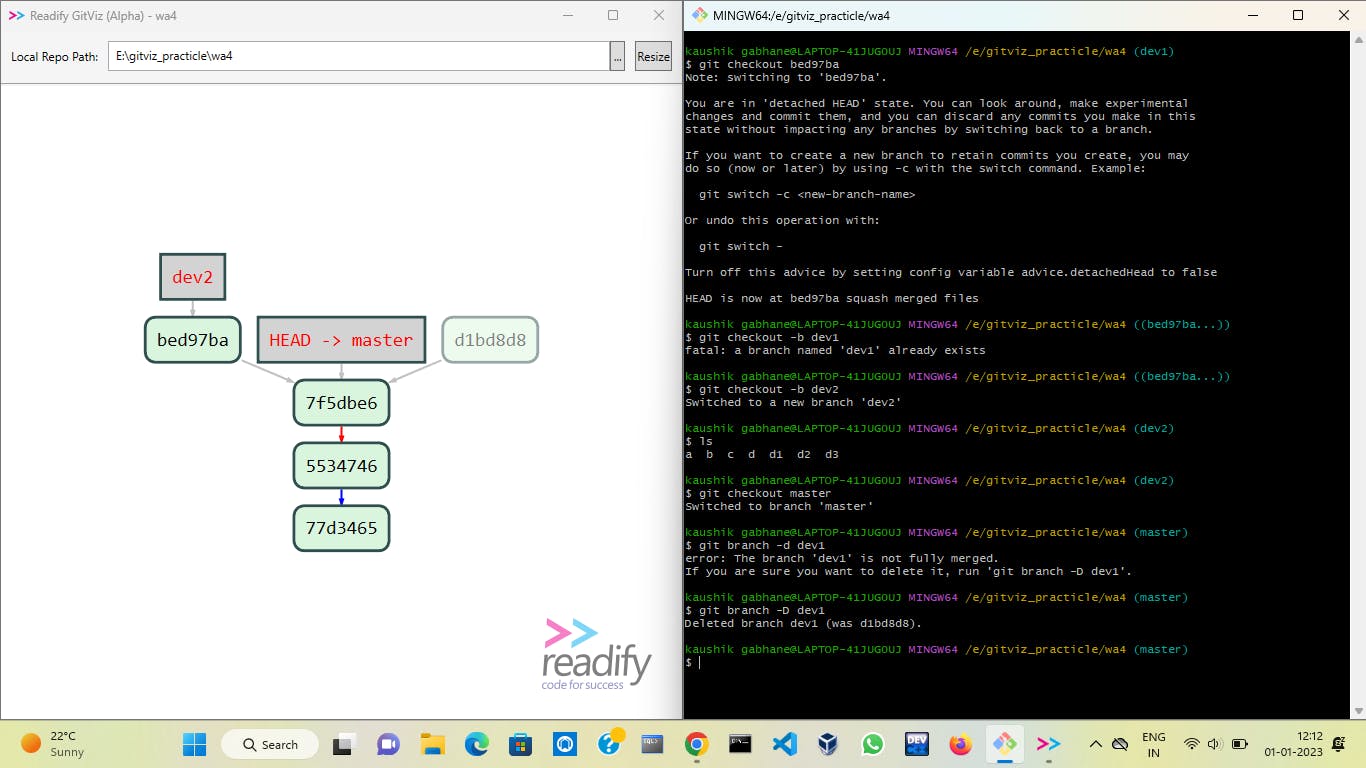
After this, you can remove the orphan node with the reflog and garbage collector commands and merge the dev2 branch to the master.
3) hard reset 💀 :
This reset will delete all data from previous commits as you reset with the hard option. The files are deleted from your working area which is from your local system also 😱. That means once you do a hard reset your files get permanently deleted.
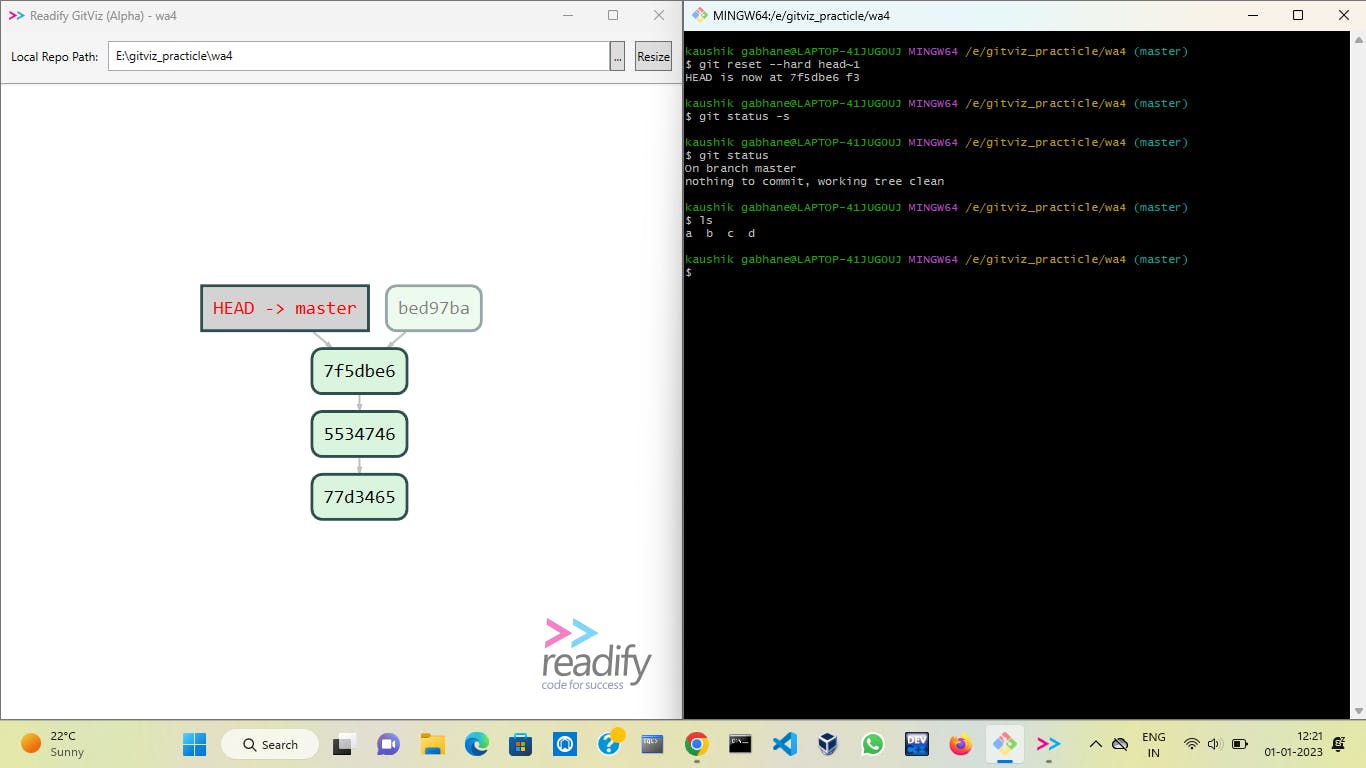
As you can see all the files ( d1, d2, d3 ) are deleted from my local computer also and this can cause some serious problems when you working on an important project.
There are some GC schedulers which remove orphan nodes automatically on some interval of time set. If this type of setting has been done in your git also then you never get back your last version if you want.
But here we can get back to it with the help of the following commands,
Now if you want you can delete branch dev1.
6) Use of checkout in file rollback :
The checkout command has many use cases in different conditions. Here we are taking a scenario that,
We have modified our file two times and we have to back to our first modification without changing any commit history.
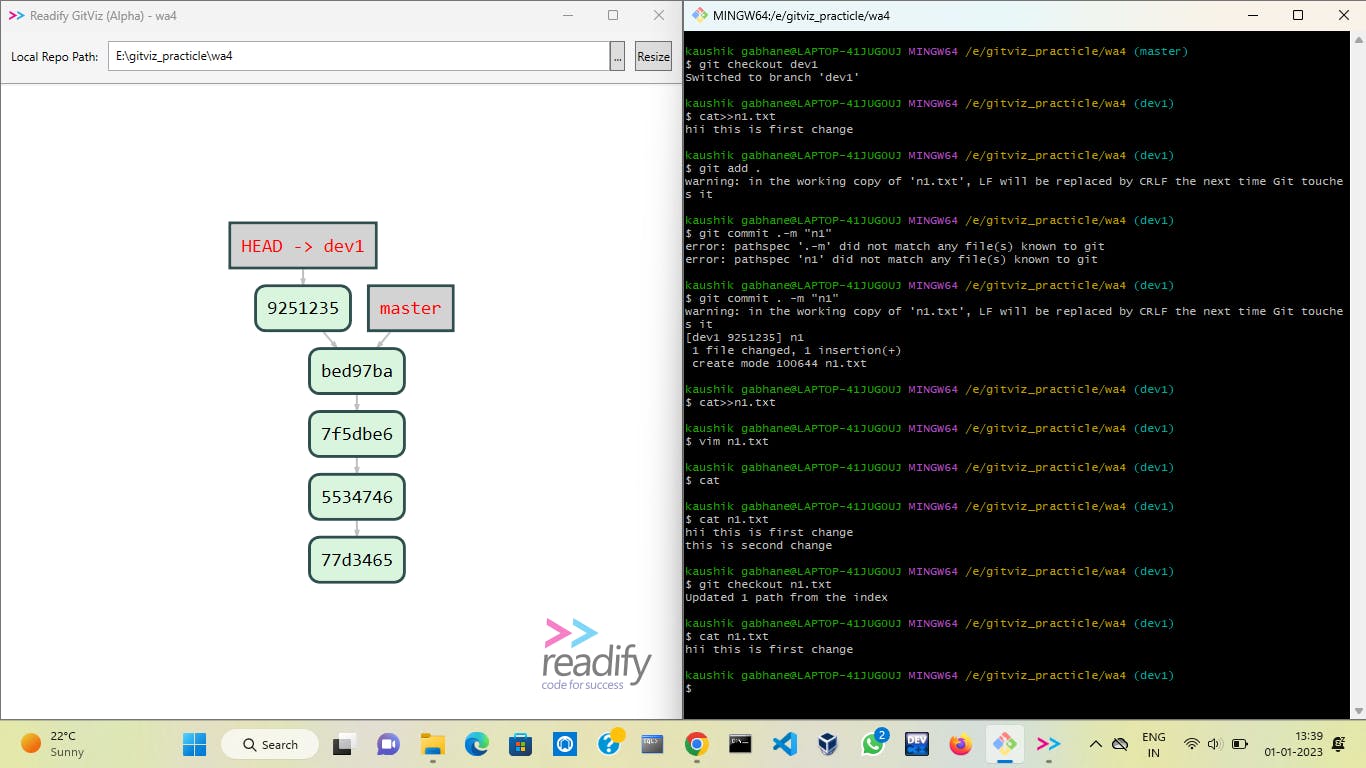
We can do it just by executing the command git checkout n1.txt . You can execute the above commands to understand the topic well.🙂
So here is the end of my git article. Make sure you will share it with your friends to help upskill them to some extent 😀. If you find it helpful then drop a heart and comment down 😉💥
Social media Links :
🖤 GitHub