


Hello everyone, I am back with another topic which is essential for every developer in his journey which is Git and GitHub. This is part 1 of this series and we will cover some more important tools of git in part 2.
🎯Why do we need Git and GitHub?
As a developer, we do a lot of coding. In a worse case our pc gets corrupted then our all files get vanished. So we need to keep a backup of our code files but if we store it in our local computer first it will take up a lot of space on the hard disk and if got corrupted then data loss may be possible.
So we need a solution which provides us with the guarantee of storing our files with near about 100% accuracy and here GitHub came into the picture which helps us in this scenario.
🎯Git as SCM :
As developers, we work in a team and for this, we need every member should have synced with the current code. So this can be achieved by storing our code in a centralized location like GitHub.
Also, we made changes in our code a lot and create versions of our code for easy management. Now to store these versions we can use a typical way of storing in HD( Backup or Snapshot) but in this lot of memory gets occupied by it and it's very hard to know what we have changed in the two versions. So here Git can help us as an SCM (source code management) tool and provides us with the feasibility of going back to older versions at any point in time.
🎯Git as VCS :
Git is a VCS (version control system) which helps us in managing versions of code. It keeps on tracking every line of code and remembers which line is Added, Modified or Deleted.
🎯repository :
The three essential areas of the git working area, staging area and commit area combinedly make a git repository.
🎯branch :
it is one of the ways of keeping the timeline of our GitHub account. we can start a branch connected to our main branch and work on it separately after that we can perform operations on a branch like a merge, pull, and delete. By default, the branch is the main or master branch.
🎯readme file :
This file uses markdown language and is used for gives an overview of our repository data. This file saw just below our code files. A link about how to customize the readme is added here.
🎟️prerequisite :
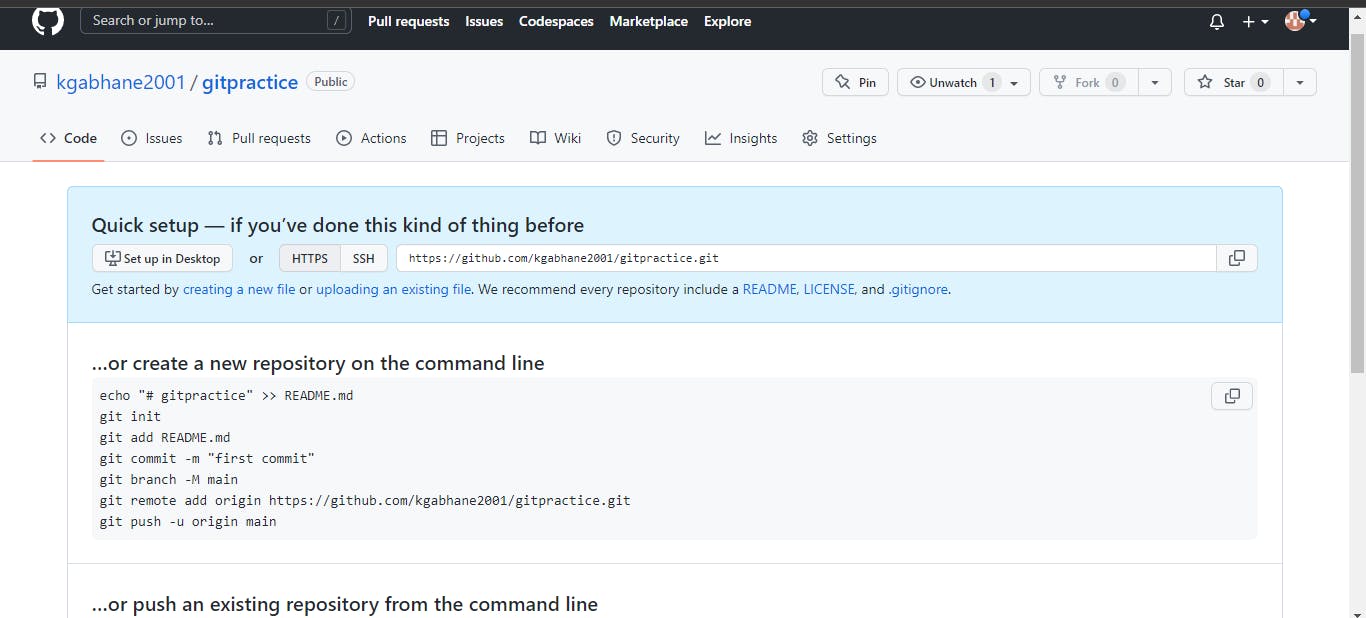
Create an account on GitHub with some basic information about you and if the student then tries to choose a free plan. GitHub.org Link
After this click on the new repository and Create a public repository ( recommended)
After creating a new repo. you will get a page like this.
🎈Configuring Git :
To install git on your machine follow this link Download Git.
After installation of git first, we have to configure our git so that it will make a connection with our GitHub account.

git config --global user.name " your username of GitHub account"
As we can see in the above code the command starts with the git config which indicates that we are going to configure an account. The second --global indicates we are declaring globally and user.name indicates user name will be added here.
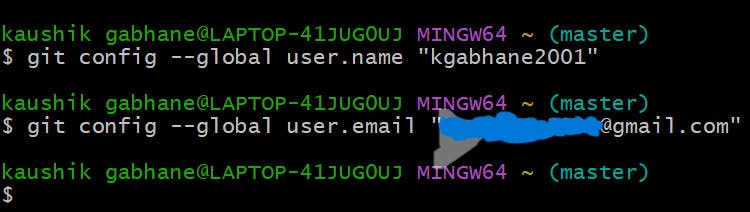
git config --global user.email "email assigned to GitHub account"
Here we are assigning the email of our GitHub account to the local git.

git config --global -l
By this command, you can see your config details.
🎯Some Basic Commands :
With these commands, you can easily start your git journey.
1) git init :
This command is used to initialize an empty git repository in your local system. This command must be used when you are in your main project folder.

Here I have html as my main project folder and you can also go to your main folder with the help of cd command and then address your folder as shown in the above example.
2) git add :
This command is used to add our files to the staging area. We can add files one by one or in a go also. The most used way is adding files in one go as another way may become tedious to add files one by one.
git add . ( here dot represents all files )
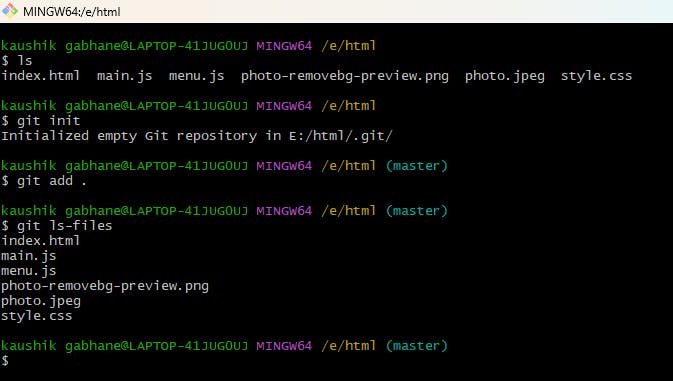
As you will see in the above example all files are added in the staging area and checked by using git ls-files command.
3) commit command :
We use the commit command when our all files in the working folder are in the staging area.
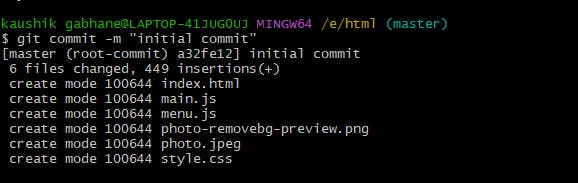
Here with this command we also add comments to remember us what changes we have done at that point in time. The option -m is used to add comments and comments should be always within double quotes.
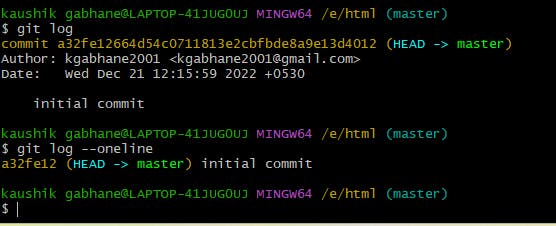
We can check our commit with the help of the git log command. It also gives a commit id in the form of a string of letters. Now if we have 10 to 15 commits then that data can't accommodate on screen and thus we can use git log --oneline which gives the unique characters of the commit id ( i.e. it's first 6 to 7 letters ).
The HEAD is always associated with the latest commit and points to the working branch.
4) git branch :
This command is used to create a branch in our GitHub account and generally the first time we create main branch with the help of option -M.

If your screen also looks like the above picture then you have successfully created a branch.
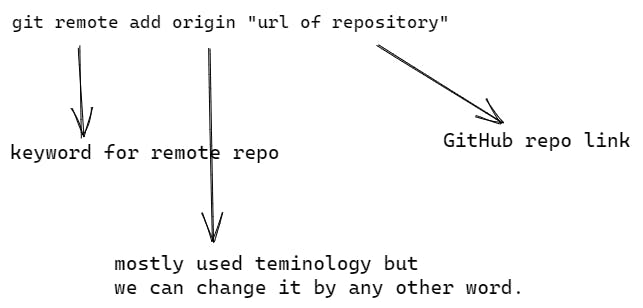
5) Adding remote :
This command is used to add our GitHub repository to our local git repository. This sets a connection(with HTTPS protocol) between our GitHub repository to our working folder and keeps on tracking files.
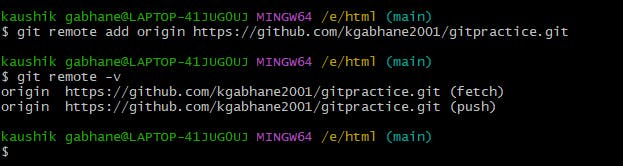
We can confirm our operation by executing the second command and it describes that our local repo knows where we have our centralized repository.
6) push :
This command is used to push our files in the committed area to GitHub.
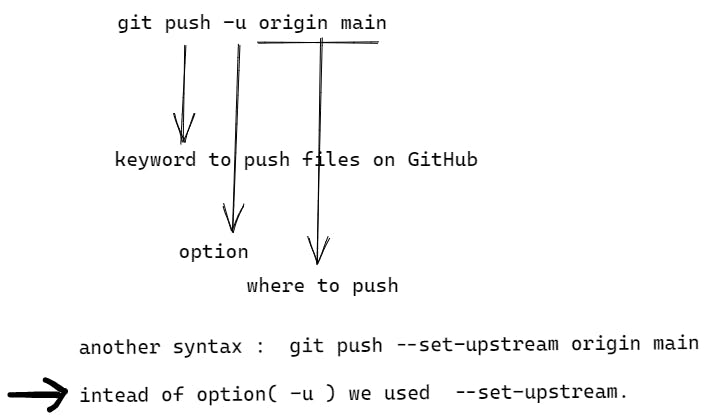

After hitting the pointed line you will see a popup block there you have to authenticate by entering your GitHub password and you are ready with your project on GitHub.
These six steps are one-time setups. Now, whenever you made some changes to your project you have to follow only these steps,
cd "path of your project"git add .git commit -m "comment"git push
Now, we can check whether our push operation is successful or not by using git status command.
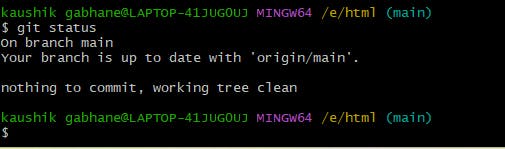
As we can see our branch is up to date hence our operation is successful.
🎯Branching :
Branching is a concept which provides us with good management of our code and team. Let's take a scenario, our team is working on a project and different features are in development. Then it's the worse case if we make changes directly to the master branch which may lead to bugs and errors. With Branching different features can be developed on different branches and only after the permission of the reviewer it gets committed to the master branch.
Let's create a branch test in our repo.
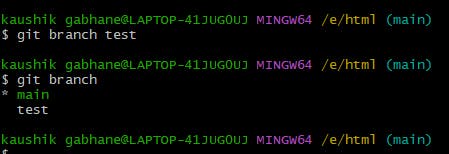
We have created a branch
testwith the help of the commandgit branch test.To check whether the branch is created or not use the
git branch. It will show all existing branches and working branch in green colour.To switch on the test branch we have a command
git checkout test.
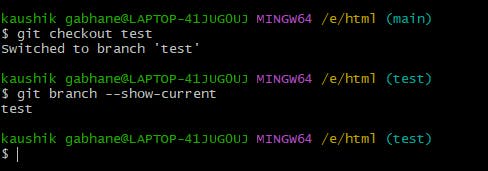
We can confirm our operation with the command
git branch --show-currentwhich shows the current working branch.Now, as we are inside the test branch we can create any file, Modify it, Merge it or delete it.
Here I'm going to create a file with the help of the
cat commandwhich is a basic Linux command. And then you can add it to the staging area and then commit it.
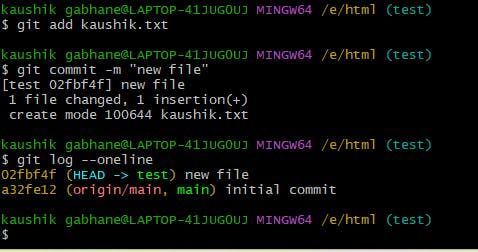
Now with the help of
git log --onelinecommand you will see that head is pointing to test i.e. our test branch is one commit ahead of our master branch.Now we will
checkoutto the master branch and then merge both branches then the file in the test branch will be moved to the master branch. Here in the below picture, you can see that,
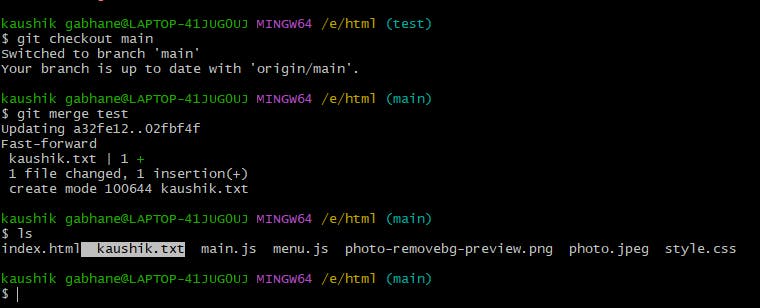
- Now, both the branches are merged thus head pointing to both branches. After use, we can delete the branch test. And we can check our operation by using
git branchcommand.
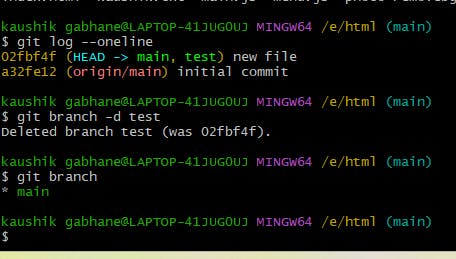
As it shows only one branch hence operation is successful.
Thanks for visiting my blog and if you like it feels helpful to you then drop a heart and comment down🫡.
Social media Links :
🖤 GitHub